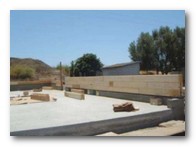
Step 1: The Foundation
The logs should be stacked as near as possible to your foundation, and if you have a slab foundation, it’s best to keep them right on it where they’re most easily accessible.
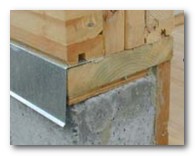
Your foundation should have 1/2″ or 5/8″ threaded rod extending from the J-bolts sunk in the concrete at approx. 3′ on center. Instruct whoever is doing your concrete work to make sure the rods are installed in the center of the stem wall, as they should extend through the center of the log. Install treated 2×8(or other size appropriate) boards using a hole saw attachment to your drill to drill holes to accommodate the threaded rod, around the perimeter of the foundation.
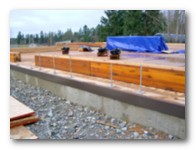
Lengths of flashing bent at an angle over the outside of the treated boards to form a drip edge and termite guard are installed over the boards before laying the walls. This is called the sill plate, and the logs will be placed on top of it.
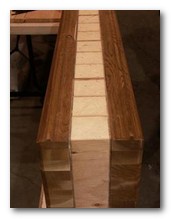
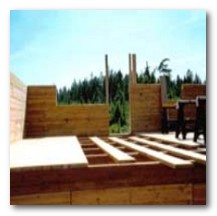
Step 2: Installing the First Layer of Sing Logs
Once the foundation is prepared…
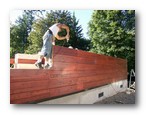
Select the logs for the first layer and place them parallel to their permanent locations. Remember that with the butt and pass method, butt joints are staggered, and alternate from course to course. When making room for door space, simply cut the log to allow enough space.
Place the first log with its end reaching to the edge of the foundation making sure that it is aligned in the proper position. Outline the upper face of the log where the tie down plate goes to hold the log to the foundation (use the plate as a guide for tracing, making sure that the rod slides through the aperture in the center). Use a router to notch out the space you traced for the tie down. Make sure it is at least 1/2″ deep to fit the thickness of the plate. If you find that blocking in between log halves interferes with the threaded rod, simply knock it out or cut around it. If you knock it out, you may have to replace it in another location by toe nailing it. If you are not using Olyscrews in your project, simply repeat this process every 3 layers, applying adhesive every course, until you reach the top plate.
  |
Remove the first log you want to install, and apply two beads of glue to the sill plate where the wood will have contact with it. Return the log, and place the tie down plates where you have notched out for them, with the threaded rod protruding from the aperture. Tighten nuts with wrench, as tight as you can. When butting logs together, it is important that this vertical seam be as tight as possible. Use plenty of adhesive, and you may also “key” this joint in the hollow space with a piece of 3″ (or double 2×4) wood blocking where the seam is, or use rigid foam insulation. You may also decide to chamfer the butt ends to provide an alternate appearance using a router or planer.
Step 3: Installing Additional Layers of Sing Logs
With the first layer done…
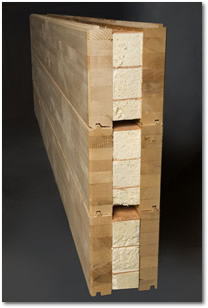
Place the logs for the second course parallel to their intended locations around the perimeter. Keep in mind again that just as the corners alternate with each layer, so should the butt joint seams. Align double tongue-and-groove joints, and squeeze a minimum of two (amounts vary according to log size & engineering conditions) thick beads of adhesive onto the top face of the log (outside of tongue) upon which you will install the first log of the second course. You should have at least one bead on both sides of the hollow space. Make sure that there is enough glue to squash down and form a tight seal when you place the next log on top. If you are using the recommended Franklin Titebond adhesive, keep in mind that in wet weather it may not fully cure for possibly 2 weeks because it’s water based, however it is very user health friendly and the screws pin the logs in place until the glue is cured. Make sure that the tongue on the bottom log is aligned correctly with the groove of the top log. If you find the tongues and grooves are fitting a little too snug, simply use a mallet and a piece of wood blocking to tamp them into place.
Drive an Olyscrew through a pre-drilled hole. It doesn’t matter which of the two wall sides you begin on, just make sure the screw is driven straight down to ensure solid contact is made all the way through the log. Be sure that it doesn’t hit the tie down plate or another screw below it. If at any time the screw threads or part of screw is exposed back it out and try again. No part of the screw should be visible (check the inside of the log to be certain the screw hasn’t gone through the curved part and is showing). Drive the screw until its head is countersunk and flush with the surface. Don’t be alarmed if the log rises further down its length, you will correct it when you drive the next screws. Be aw a leveling device, backing it out or driving it in tighter until its level. Avoid driving the screws into knots. After you gain a sense for the procedure and how it should look, you can are that the screws may alter the leveling somewhat, but you can actually employ the screw check for plumb and level every 2 or 3 layers.
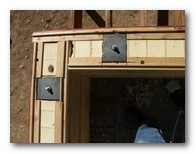
Step 4: Windows, Doorways, and Trusses
When working around openings for windows and doors…
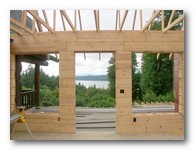
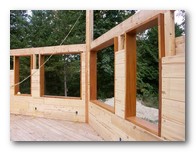
Logs may partially reach into the opening to be cut out later if you’d like to speed up construction, but make sure you avoid the corrugated staples in the spacers as you cut. You may also want to let one course extend entirely through an opening as this has been found to reduce leveling complications, and cut it out after completion. Make sure that the course of logs that completes an opening, the header, is continuous over that opening.
Windows using Sing Window Frame… Window Buck… Sing Core Window Buck…
The window /frame unit can be pre-assembled and finished at the factory, ready to be fastened to the log walls rough opening. This saves labor for on-site framing, bracing, leveling and installing windows.
Interior Walls…
Interior walls could be constructed with 10×5 Interior Sing Logs, or conventional 2x framing. Various finishing materials could be applied to the 2x framing, such as Sing Paneling or gypsum wall board.
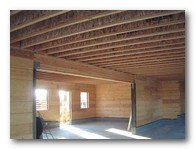
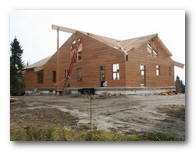
Trusses…
Trusses or other types of roof structures can be installed onto Sing Log walls in the conventional way. Insert double 2×4’s into the cavity of the top layer Sing Log to form a solid bearing surface for the roof structure
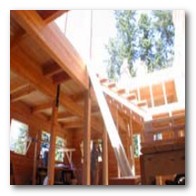
Step 5: The Second Floor
If you have a second floor or loft, you can hang it directly off of the wall. Nail or screw 2×8 or 2×10 nailing strips onto the wall, and attach joist hangers to the strips.
Place the joists in the hangers and proceed with the deck, which can be a variety of materials including plywood, card decking, or other.
Step 6: Finishing
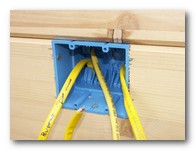
Electrical Outlets…
The easiest way to go is to use the remote system for your outlets they are inexpensive and require no wiring. Another option is to run your wiring along the floor and up the corners and cover with molding.
Outlets for lighting and electrical connections are relatively simple. Pick the log which will contain the outlet before installing it, and using your circular saw (or reciprocating saw) cut out the outlet from the interior wall half of the log, starting from the top. This is more easily done if your outlets are placed horizontally. Wiring should be prepared beforehand, so you can simply pull it through the hole to connect to the socket or fixture later.
Since the logs are staggered, there should be continuous space to weave the wiring inside the hollow space. You may also “fish through” after the wall is completed, use conduit, or have all outlets in the floor and ceiling.
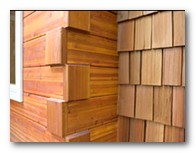
Corners…
Use a router or chisel to remove the tongues from the section of log which will become part of a corner. Exterior corners should be foamed in with spray insulation (common types like “Big Stuff” or “Dap” are readily available from your local hardware store) and covered with 1″ cedar trim up the entire vertical lengths of both sides. Use sufficient caulking around the seam between the logs and the trim, as well as where the trim boards meet to ensure a perfectly tight seal.
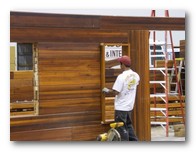
Stains…
Once your walls are erected, and before windows and doors are installed, you should apply a stain to the outside facings. A porous, at least slightly tinted stain is recommended to prevent moisture and UV damage. It should preferably be designed specifically for log homes. We recommend Sikkens� Cetol� exterior and interior finishes as they have been thoroughly tested and proven to be superior.
Caulking…
For any log to log, or wood to wood caulking requirements, we suggest using Sashco Logbuilder. It has proven very easy to apply, extremely flexible, and long lasting.
Adhesives…
Recommended adhesives include Franklin titebond solvent free construction adhesive, PL Premium, PL 400, and 3M 5230. We prefer the Franklin Titebond because it is water based and requires no protective gloves etc. during application, and very easy to use and clean up.