Gorilla polyurethane glue is an effective glue for joining Sing panels. We recommend consulting the glue manufacturer website for instructions on use of the adhesive. For Gorilla Glue, look here.
Failure to follow the joining instructions or the manufacturer adhesive instructions could void the
warranty on your panels.
Before you begin
Attention: Please read all instructions before starting to assemble your panel
Follow the acclimatization instructions before joining panels
1. Lay Your Door Panels Flat
It is crucial that all of your panels are resting on a flat surface and are completely level. If you attempt
to glue the panels together against a wall, or any way other than flat, you will end up with a crooked
joint and “warped” door.
The first step to join a Sing Core sectional door is to lay the panels on a flat surface.
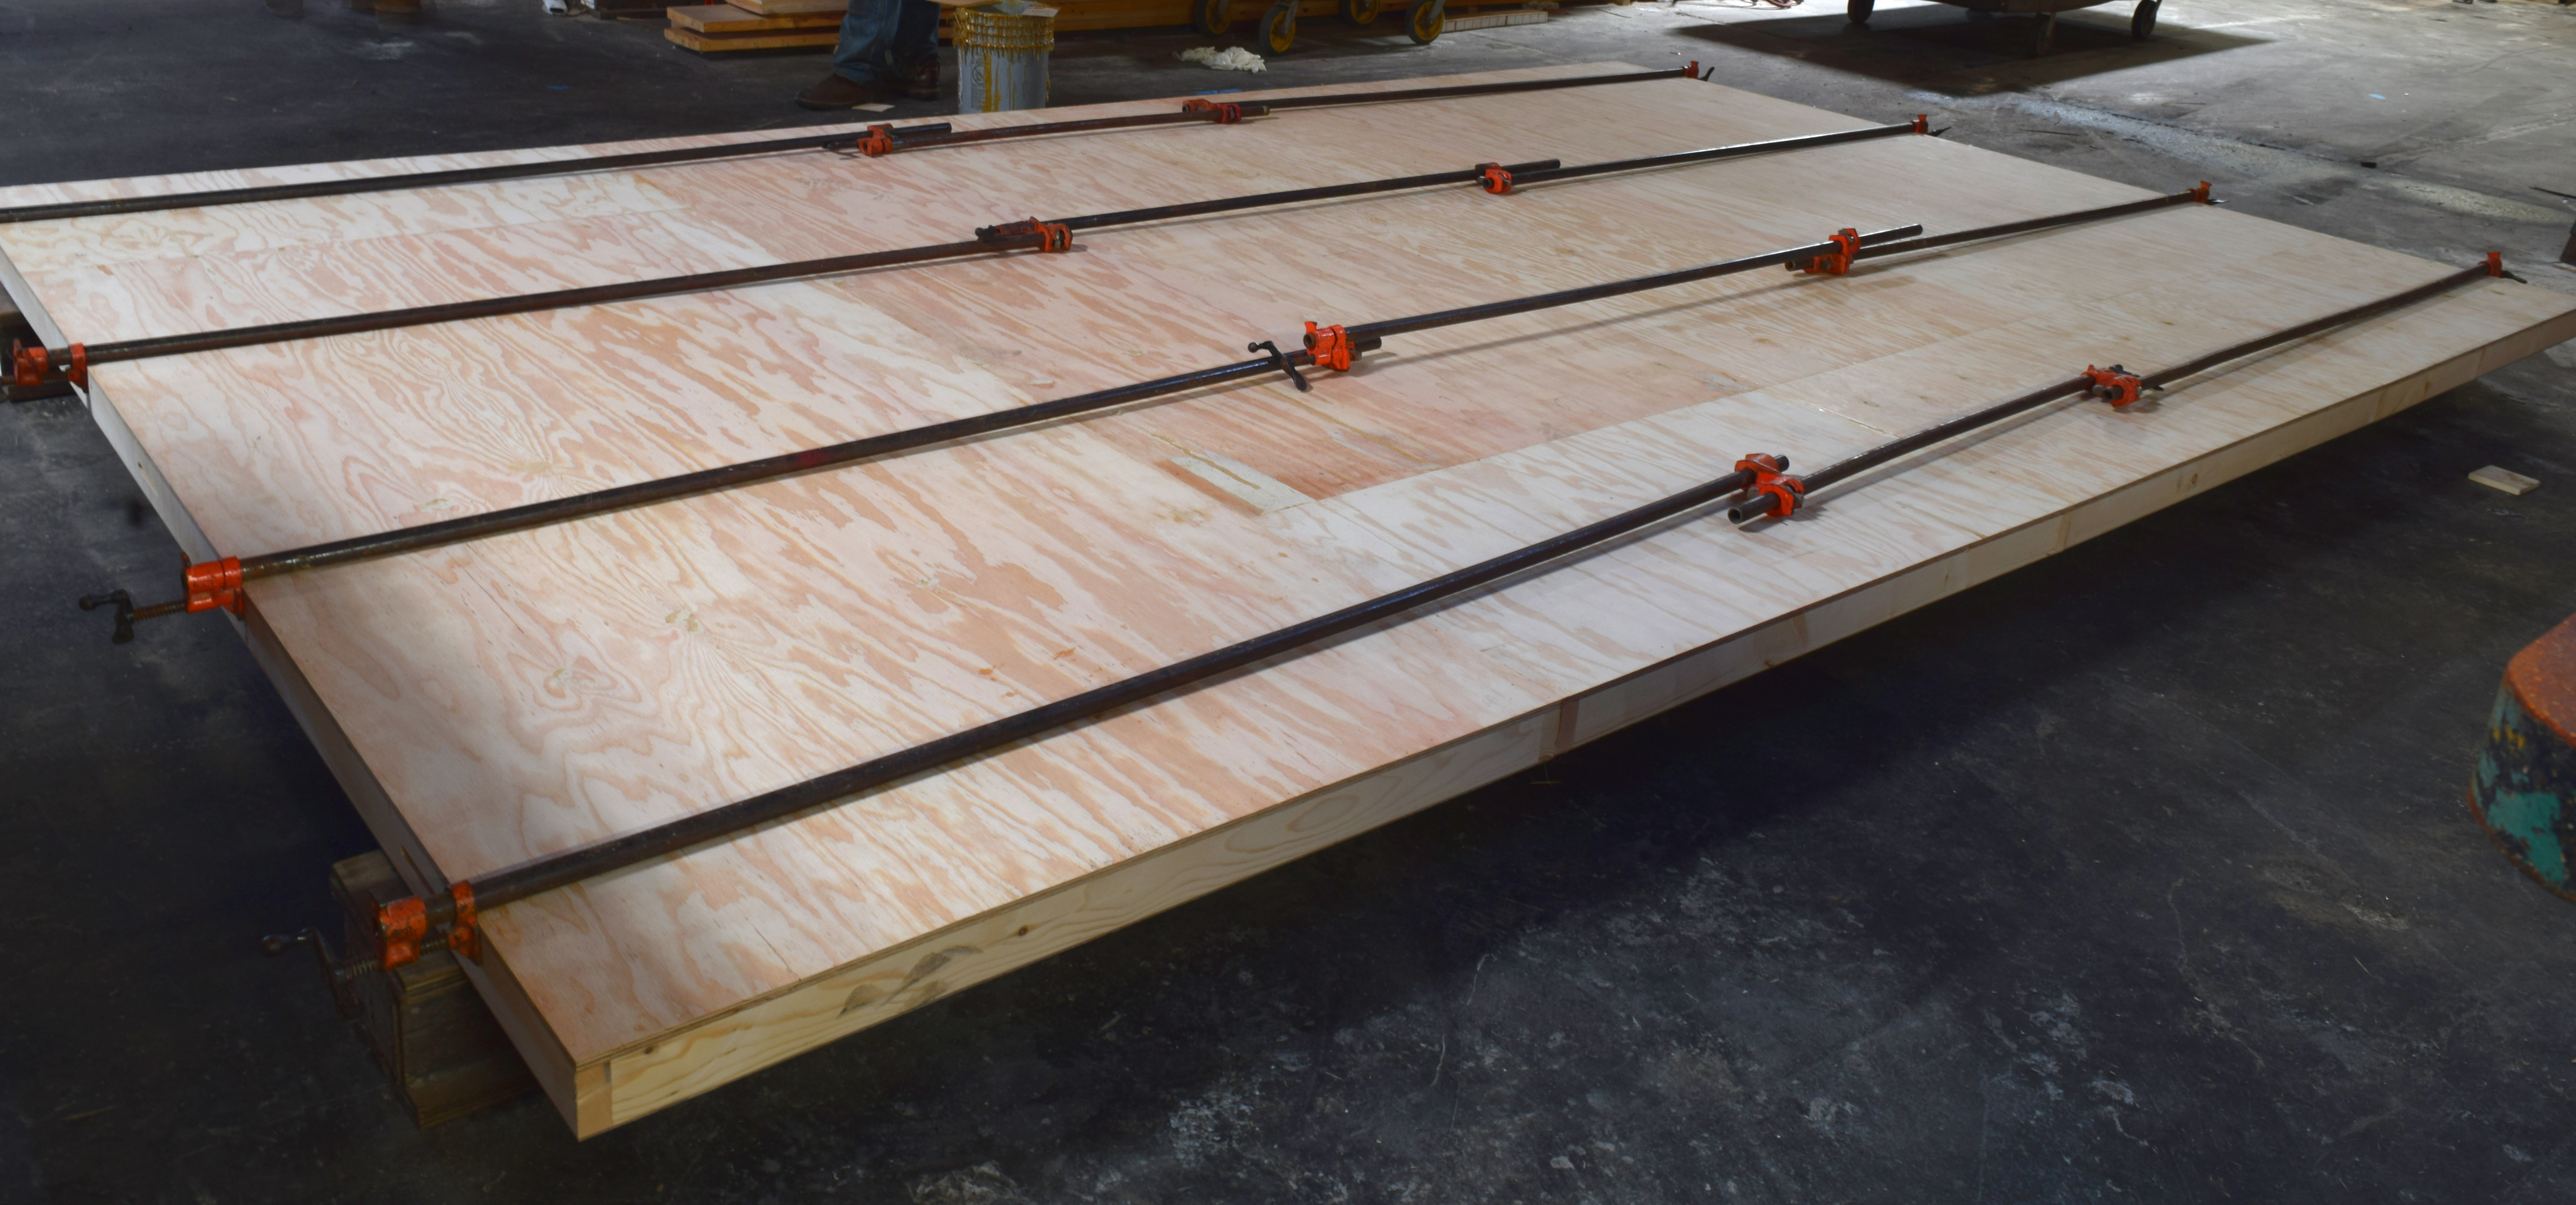
For very large door panel assembly please place straight guide beams on top of sawhorses so the
bottom of the panel can be accessible.
Assemble on a Flat Work Surface
To ensure best results, it is critical that you assemble your panels on a flat surface. If you do not
have a work surface large enough, the best way is to build your own.
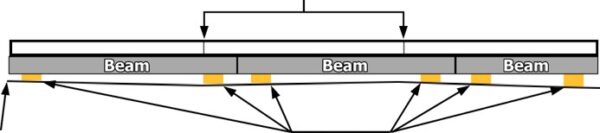
The best way to level your work surface is to lay guide beams end to end, then use shims to level
each beam. It is important to lay your beams perpendicular to the joints on your panel.
Panel Seams
Uneven Floor Surface Shims
For wider panels you will need more rows of beams to distribute the weight more evenly and to ensure flatness of the joined panel. Make sure to level each additional row of beams with your initial row that you have already leveled. Once your work surface is level, you are ready to join your panels.
2. Glue and insert Your Biscuits or Spline into the Edge of One Panel
 Each biscuit and slot are precisely cut to join with the greatest strength. After applying the glue to the slot and biscuit, do not use an excessive amount of glue. If the air is very dry a light misting of water can help the bond and cure time of the glue. Carefully push or hammer each biscuit lightly in place into the edge of one panel. Tap in with a rubber mallet.

3. Joining the Panels
The final step in joining your panels is to press the sides together. This can be accomplished a variety of ways, including gentle application of a sledgehammer, a few ratchet straps, clamps, or any other means you have of providing joining force.
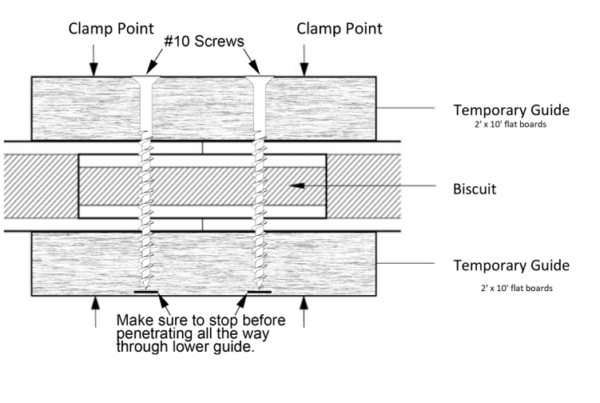
4. How to Clamp at the Join
When you want perfect alignment for very high tolerance applications, it’s best to sandwich each joint with a straight guide temporarily during the gluing process. Polyurethane Glue expands during the cure process. You will be ensuring the glue does not expand and bow the joints.
You will need:
Flat boards to clamp or screw to (depending upon the size of your panels); Clamps or screws to create pressure on the joint while the glue cures; and a flat surface. If your panels are so large that you need to use rows of screws to clamp the joints you will need to putty the holes before finishing.

—Old Instructions—
When your beautiful new Sing Core door sections arrive, it is important to take the time to glue the door together properly using polyurethane adhesive. Although Sing Core panels are guaranteed warp-free, we cannot guarantee work done on site. Failure to properly follow these directions may result in a poor final product.
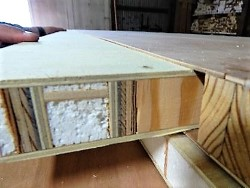
Sing Splines Don’t Crack
Sing Core uses our patented core material as a spine to join several panels on site. Unlike solid wood, the stability of the core material means that there is no danger of cracking or splitting of the seam at the join location. When Sing Core fabricates your door as a single panel it is almost seamless. When a door is splined, it is not as high precision as a single panel due to the tolerance of glue, which is roughly 0.01-0.02 inches.
Join on Site in Three Steps
1. Lay Your Door Panels Flat
It is crucial that all of your panels are resting on a flat surface and are completely level. If you attempt to glue the panels together against a wall, or any way other than flat, you will end up with a crooked joint and a “warped” door.
The first step to join a Sing Core sectional door is to lay the panels on a flat surface. Any flat clean surface will work. For very large doors we like to use two straight beams laid on the ground along to hold the top and bottom of each door segment.
2. Insert Your Biscuits or Spline into the Edge of One Panel

Each biscuit and slot are precisely cut to join with the greatest strength. Carefully, push or hammer each biscuit lightly in place into the edge of one panel. Then your panels are ready for joining.
3. Joining the Panels
The final step in joining a modern sliding or pivot door is to press the sides together. This can be accomplished a variety of ways, including gentle application of a sledgehammer, a few ratchet straps, clamps, or any other means you have of providing joining force. Once joined, the door is strong and secure, built to last, and can be finished and installed as any other Sing Core door.
Joining Large Sliding Pocket and Pivot Doors-Animated
Joining in Action
How to Clamp at the Join
When you want perfect alignment for very high tolerance applications, it’s best to sandwich each joint with a straight guide temporarily during the gluing process.

In order to make your process easier, Sing Core offers construct custom true straight guides for your application and ship them with your order. These guides are made with the same high precision core material as our other products and offer superior ease and performance.
Specify you would like clamping guides when you place your order and we will gladly include them for you.